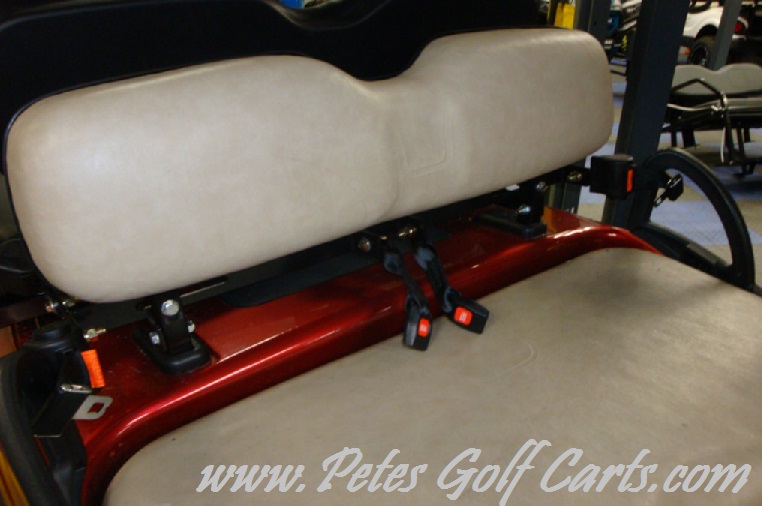
Now that you have purchased your new set of golf cart seat belts, you are wondering “how do I put them on my golf cart”? Well, here is a little handy step-by-step guide put together by Pete’s team to do just that.
Please: read all of the following safety and service instructions before attempting installation.
Remember, safety first
Wear safety glasses during installation. Park your golf cart on a flat surface and apply parking brake.
Tools required:
- Electric or portable power drill
- Drill bit set
- 3/8 drive racket or similar
- Metric socket set and wrenches
- Safety Glasses
Golf Cart Seat Belts Installation Guide Step-By-Step
Step 1
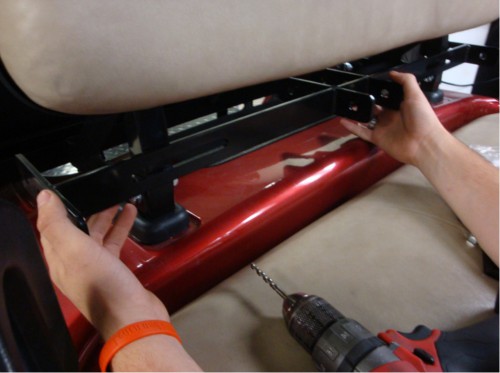
Line up your new golf cart seat belts bracket behind the golf carts seat back support with the short end facing forward and the short seat belt bracket in front of the seat back support (YOU MIGHT HAVE TO REMOVE BOLTS TO THE SEAT BACK SUPPORT TO GET LONG SEAT BELT BRACKET IN PLACE).
Step 2
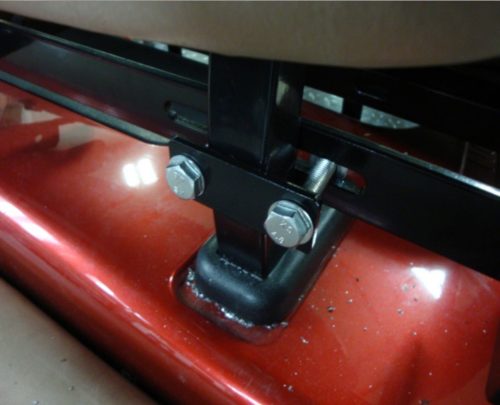
Use (4) M10X60 bolts, (8) M10 washers, and (4) M10 nuts to position the golf cart seat belts bracket in the desired position.
Step 3
You may now attach – with supplied bolts – the retractable golf cart seat belts on the bracket ends using (2) 7/16 flange bolts, (4) 7/16 washers, (2) 7/16 thread rings, and (2) 7/16 nuts. (See Image Below)
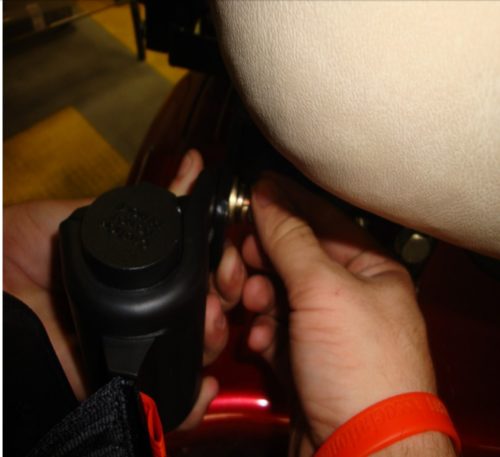
Step 4
Now you can bolt the lock buckles on the inner mounting plates of the golf cart seat belt bracket using included (2) 7/16 bolts, (4) 7/16 washers, and (2) 7/16 nuts. Once completed you have successfully installed your new golf cart seat belts. (See image below)
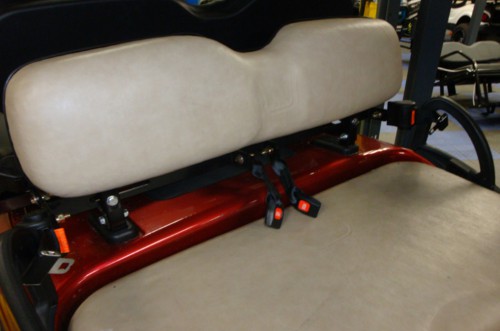
Get yourself some golf cart seat belts
If you are looking to purchase a new set of seat belts click here to learn more. And remember to be safe out there. Seat belts are a good first step for safe golf cart fun. Remember, driving with care and attention is even more important.


