


Have you purchased an older model Ezgo golf cart recently? Are you just finding out on the latest battery replacement that the factory battery bracket is rusting out? Whatever the scenario the situation is usually the same. The Ezgo battery tray is usually a rusted mess if it is a decade or older. From the factory the Ezgo battery rack is made of low quality steel components. Buy Pete’s custom made Aluminum battery tray for Ezgo carts now
Solution
Pete’s All Aluminum replacement Ezgo golf cart battery tray. We will start by disassembling the golf cart to allow for removal of the old Ezgo golf cart battery tray. The following images are in chronological order for illustration purposes of the removal process.
Tools required
- Standard and metric socket set with ratchet
- Torx bit set
- cordless impact/drill
- large flathead screw driver
- (Pro-level installation Plasma cutter or Air dremel with cutting disk)
Step 1
This installation will require the removal of the golf cart’s roof and rear roof struts. We will also need to remove the seat back and upright struts the seat back is mounted on. Next will be the removal of the rear motor access panel. (Requires small torx bit)

Step 2
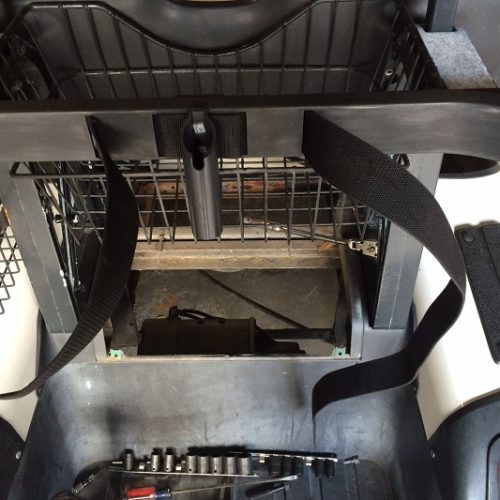
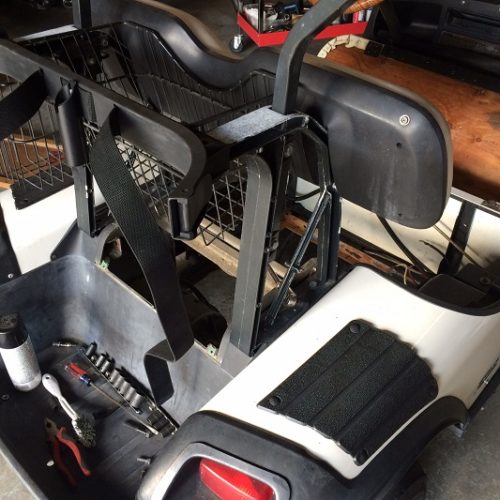
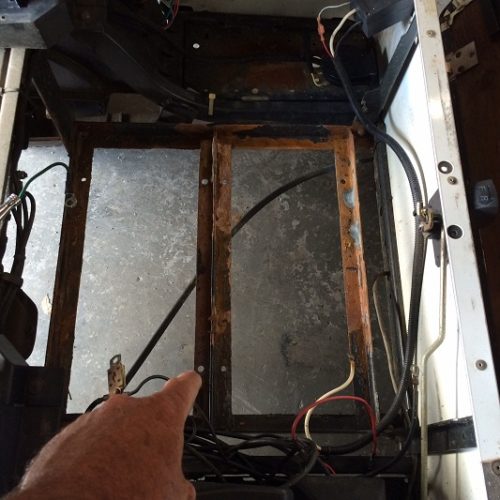
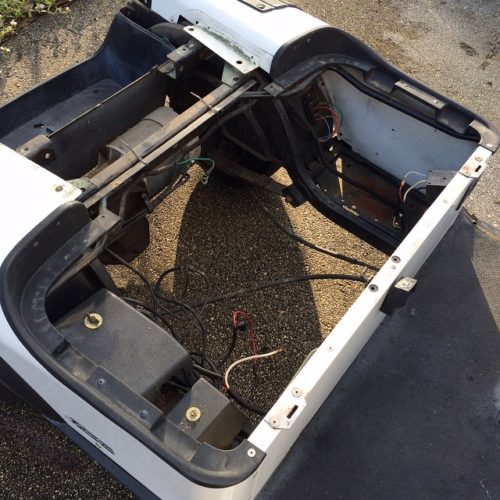
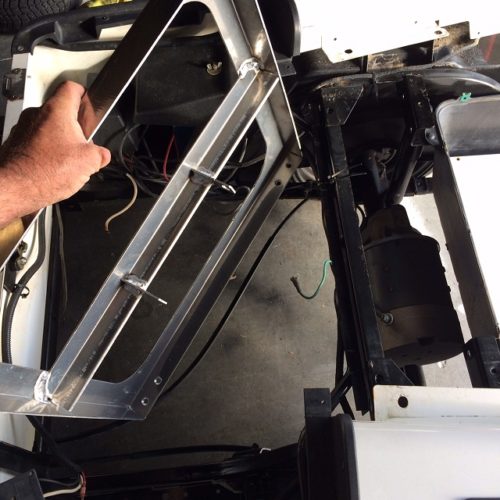
After the removal of the aforementioned Ezgo golf cart body parts and panels the image on the left shows what state your Ezgo golf cart should look like.
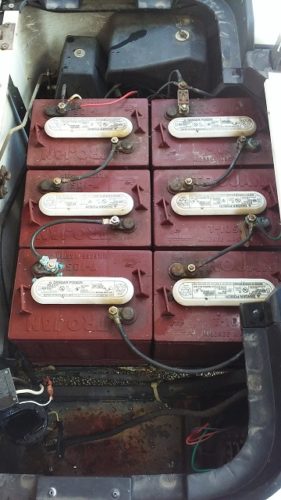
Step 3 – Remove the batteries
Note – take a picture of the wiring of the battery bank for future use when installing the new golf cart batteries.
Step 4
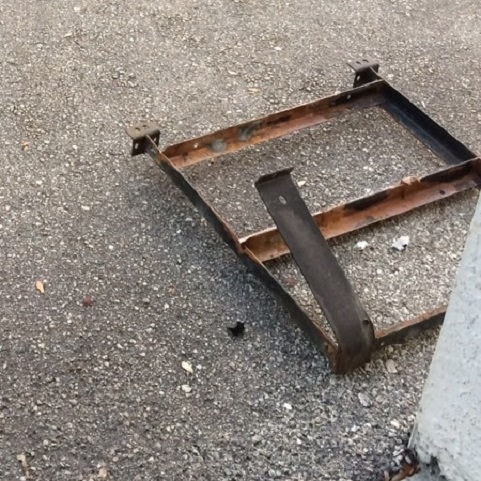
After the batteries have been removed we will be removing the old OEM Ezgo golf cart battery rack. (Some are easier than others – depends on how bad the corrosion damage is on the original battery tray – I have seen them so bad the customer didn’t even know until they hit a bump and a battery fell out the bottom – Oops!!!)
Image Guide
1)
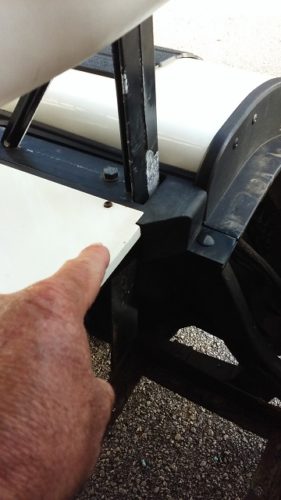
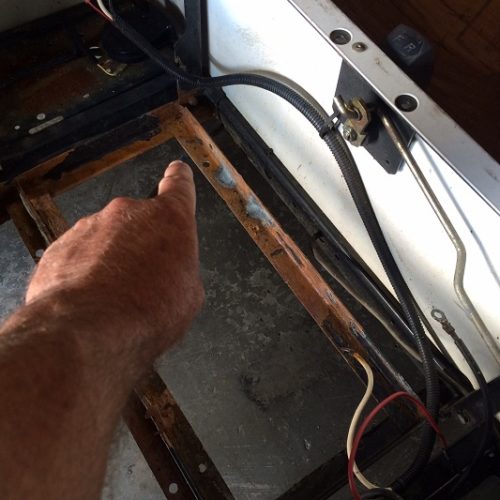
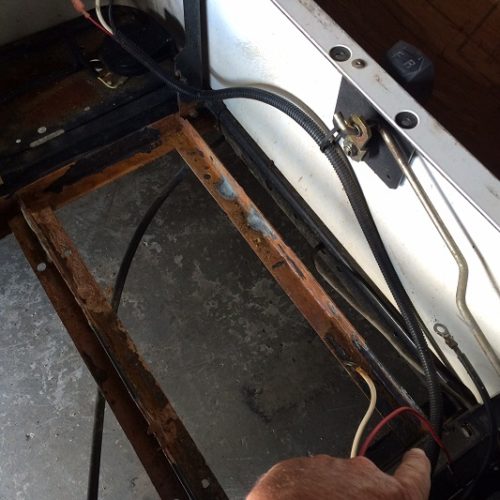
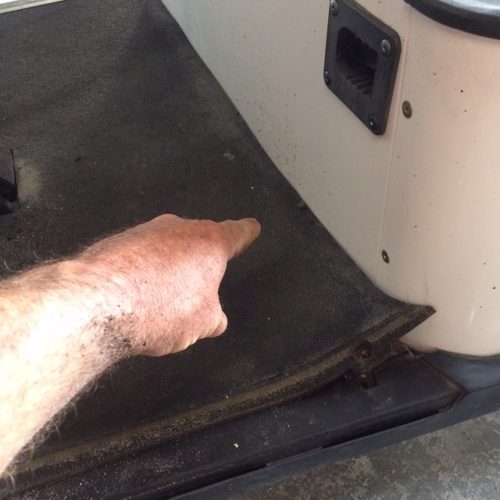
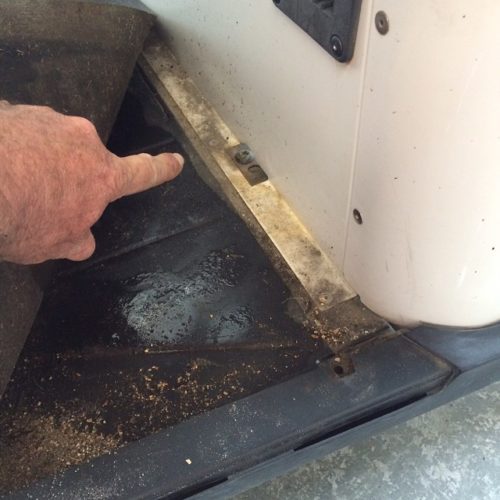
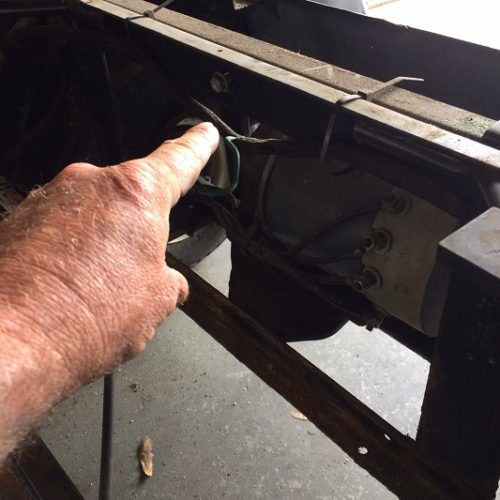
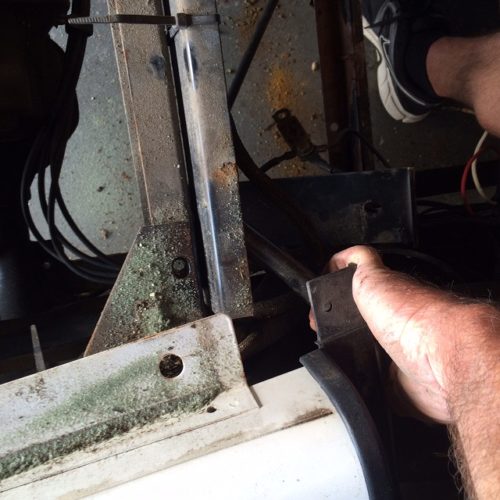
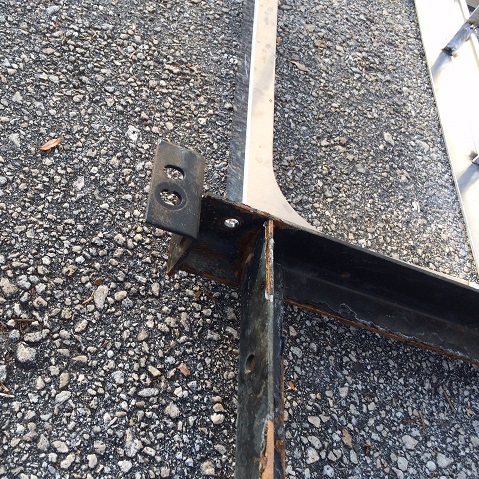
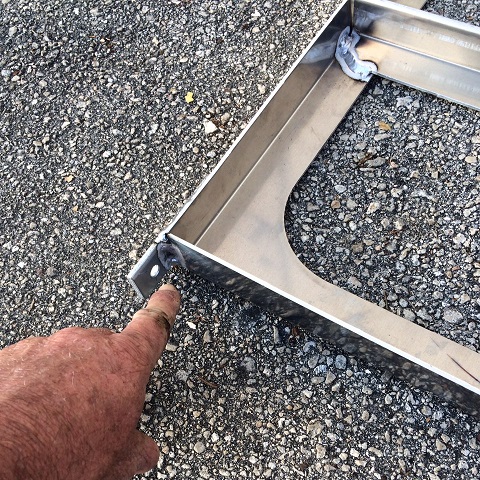
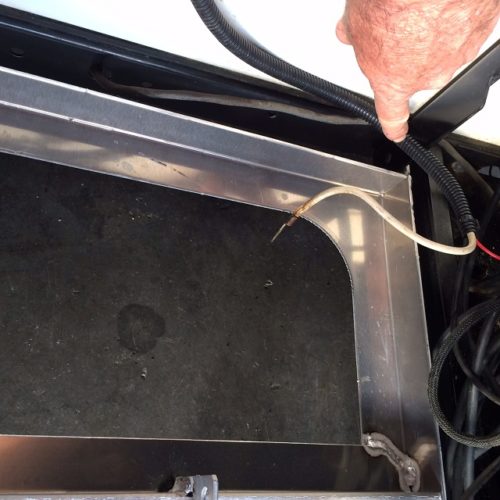
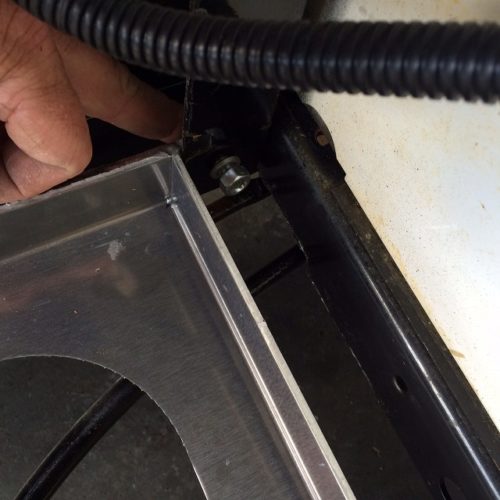
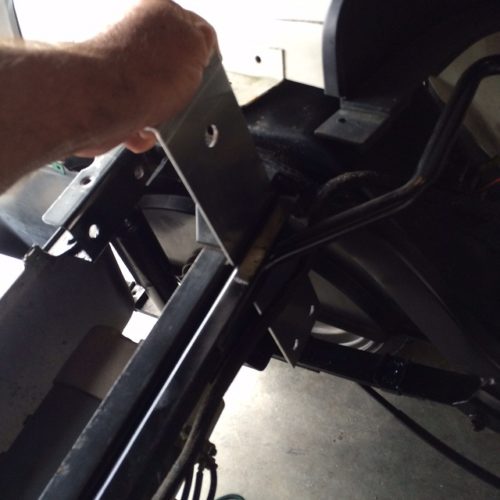
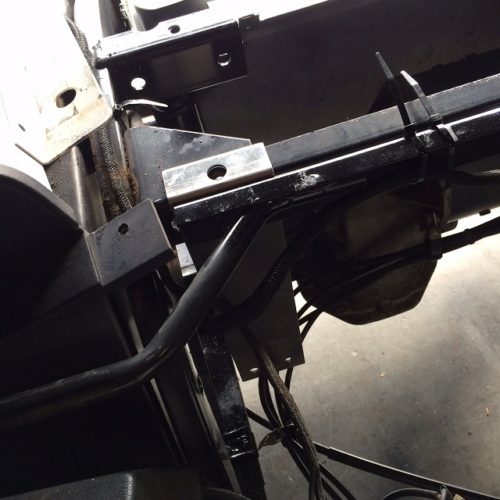
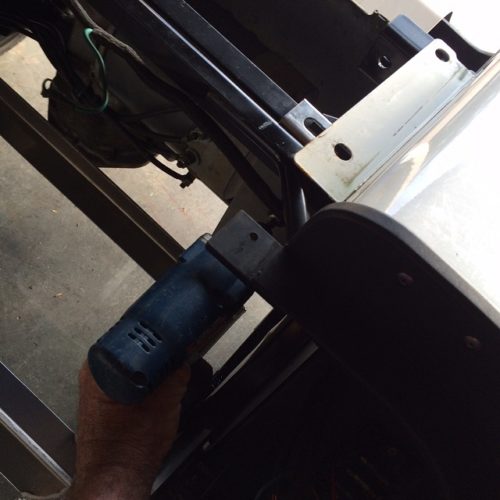
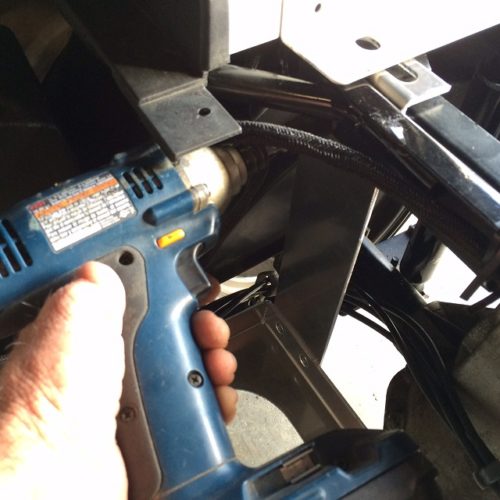
Images 2 and 3. I am pointing to the bolt locations that secure the battery tray to the inside battery hold uprights that give the rear body panel additional support. They will need to be removed.
Pro-Level Installation
You can just cut the old bracket right before the upright and bolt location with a air dremel and cutting disk or a plasma cutter. Once cut you can step on the battery rack to have a clean angle to cut bolts. This is sometimes required because the corrosion is so bad you cannot get a wrench or socket on the bolts anyhow. This step will also allow you to bypass the next two steps and save some time.
2)
Remove the floor sill plate to be able to lift the rubber floor mat. Under the floor mat you will find two (2) Torx screws on the opposite sides of the golf cart. These screws hold the battery rack in place. Remove screws and then you will need to manoeuvre the tray out from under the body panel. (This is why we usually cut the old one out with a plasma cutter – time saver step!)
3)
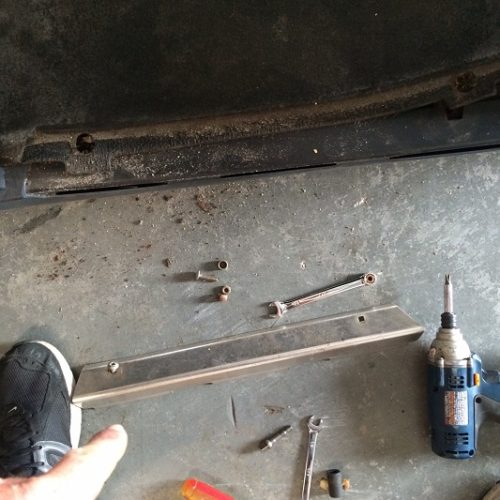
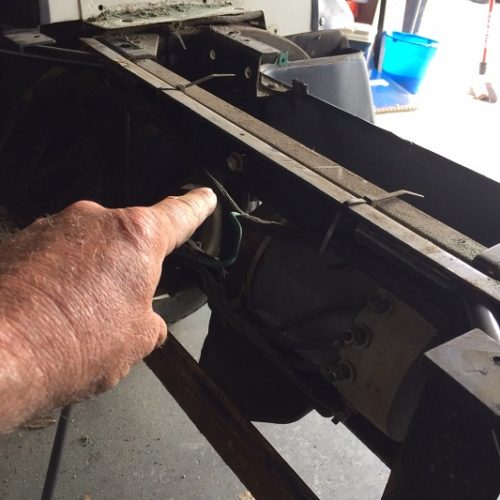
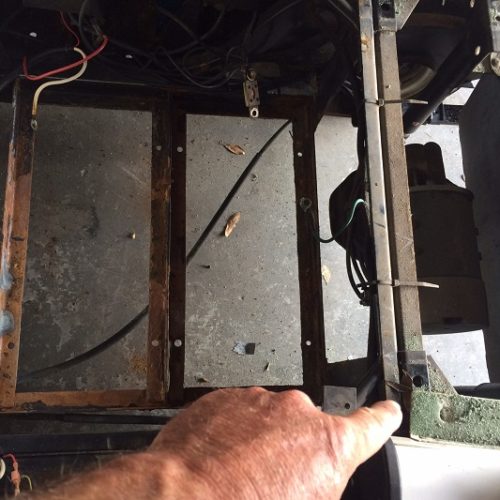
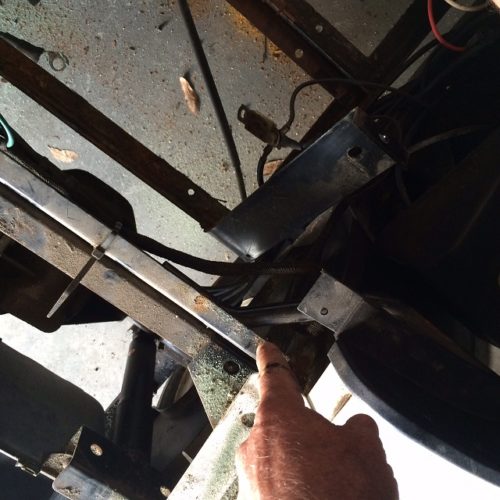
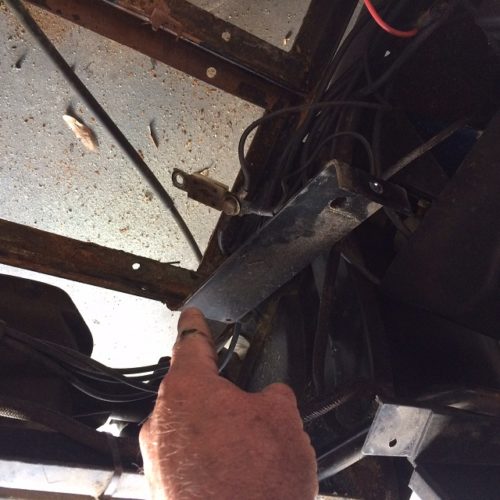
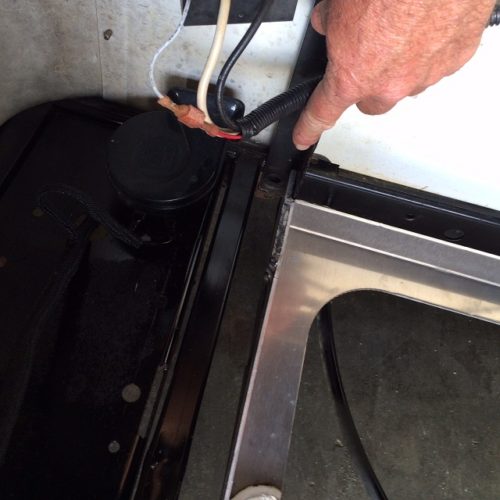
Next step you will need to remove the bolts holding the rear body panel support. Images above from left to right show three bolt locations that need top be removed. Once removed, take your flat head screw driver or pry bar to separate the two pieces of angle iron that make up the body panel support. Then you can bend down the original battery tray hangers to complete the removal of the old Ezgo golf cart battery tray. See images below:
Once you have removed the old Ezgo Golf cart Battery tray we are now ready to clean up the area a little bit and install the new Pete’s All Aluminum Ezgo Battery Rack Replacement.
Step 5
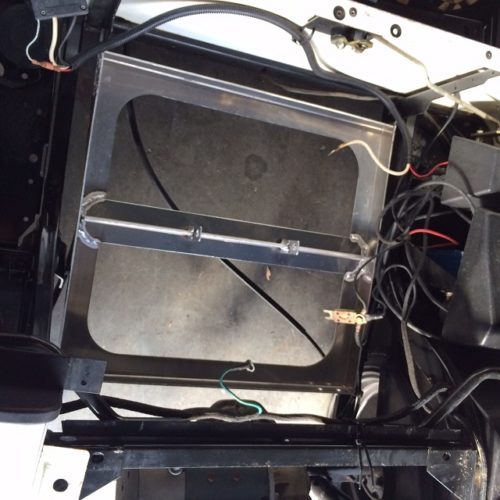
Now that we have removed the old OEM metal battery tray we can begin the prep to install Pete’s All Aluminum Ezgo Battery Rack. (Image above right shows a comparison between the OEM style mounting position and mounting section of the tray compared to Pete’s Ezgo Battery Tray. Pete says they have fine tuned this process because they have replaced so many he wanted to save time and energy doing so. Literally you can have the new one in in 5 minutes from this point. )
Note
Now is a good time to clean up the area and paint anything you might want to spray or if you are adding 12v accessories like Golf Cart Light kits, stereo, or even a battery level indicator gauge for the dash, etc… Makes it a lot easier to have space to move around to mount a voltage reducer and run wires to the desired accessories and locations.
So now with the removal process complete we will stop and catch our breath. Drink a beer or something refreshing if you like and then we will continue with the installation process of your new Ezgo golf cart battery rack.
Installation – Process
Step 1
Grab the new battery tray and angle it into the battery hold area of your golf cart with the pilot holes for the rear hangers facing down.
Position it in rear end first and then align the front tabs with the mounting holes in the lower section of the body support uprights.
Special Note
Pete’s most recent revision to his battery tray is now all models have a slotted mounting hole at this location to allow for installation of this Ezgo battery rack on similar models with minor if any modifications. Not just the TxT models.
Step 2
Once the battery rack is positioned correctly and the slotted holes are lined up with existing mounting holes in the golf cart frame, you will need to install a 5/16″ or 3/8″ bolt into the front tabs and secure with washers and lock nuts.

Step 3
Now we will move our attention to the rear section of the battery hold area and secure the battery tray hangers to the golf cart frame and connect them to the battery tray itself. Make sure all the thru bolts have been removed from the rear angle frame rail so you can easily pry them apart with a screwdriver. (Most people over look the center bolt.) Pry the two angle iron cross members apart just enough to slide the rear battery tray hangers into position.
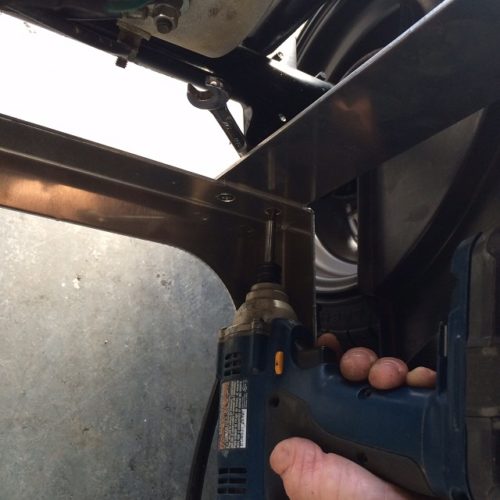
Step 4
Now we will grab the provided stainless steel flat head bolts and lock nuts to secure the hangers to the battery rack itself. Once this step is complete then you will move on to secure the upper cross member again with the factory screw bolts. Lastly you will re -install the seat back and rear roof strut upright brackets.
Note
They are not always universal – Some are left side and right side specific.
Additional Note
Added accessories: Rear Seat Kits or Utility / Truck Bed Installation – Now is the opportune time to install these accessories because no disassembly is required. You can begin with the rear upright support systems included with the respective kits. Both these kits have different support systems and would require removal of the OEM struts and supports.
At this point (after installation of respective upright support systems for the accessories on your golf cart and all bolt locations have been secured) you have completed the installation of your new Ezgo golf cart battery tray and can proceed with the installation of your batteries and wiring. Read more about battery installation.
Get the parts
Buy BatteryPete’s Ezgo Golf Cart Battery Tray
Get in touch
Please feel free to leave a comment if you found this article helpful. Pete always likes to get feedback from customers and golf cart guys alike.
Should you have any questions regarding anything golf cart related. Feel Free to call us today! Pete’s team is always standing by to help you. 772-247-4653