


When you finally get your battery watering system in the mail. It is time to install it. No need to worry, it is a fairly straight forward process.You will need a few tools to make the job easier.
 Tools Required
- Flat Head Screw Driver
- Pliers
- Hose Cutter or Razor Knife
- Scotch Tape or Similar
- Water Hose
- Running Water
- Scrub Brush (soft plastic bristles)
- Wire Brush (Small)
- Rubber Gloves
- Rags
Preparation
Make sure the batteries have a full charge. Giving them a fresh charge with your golf cart battery charger will give you a accurate water level reading after the new battery watering system is installed.
Need a charger?
If you need a good quality golf cart charger Pete’s Golf Carts offers both Lester Electric and Delta Q golf cart battery chargers at incredibly low prices.
Cleaning
Now unless the batteries are brand new you will want to start off by cleaning the battery tops to remove any battery acid, dirt, rust, corrosion etc… from them. While you are on the task it would be recommended to check all battery connections and look over battery cables. Any corrosion build up on terminals can also be removed with a little baking soda and wire brush (coca cola or similar) will also work. After complete rinse off with water thoroughly and wipe down. Let dry or you can blow off with air pressure or leaf blower.
Find some space
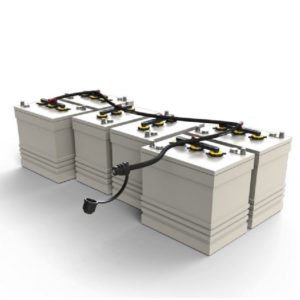
Now you are ready to lay out your new water system. Find a nice flat surface about the approx size as the battery bank. If you ordered a pre-cut kit for a specific make and model golf cart open all related packages and assemble the system on the ground to make sure it is complete. If you ordered a universal kit layout the system components and count the battery cell watering valves to make sure you have enough for every battery. Then check to make sure you have enough hose to complete the job. After this quick check you will be ready to proceed with the installation.
Installation
Using the flat head screw driver or similar tool you can start by removing all the battery cell caps and anything like hold downs that will restrict access from the installation of your new battery watering system.
Put in the valves
Then replace all the battery cell caps with the new watering valves. Some kits like the hydrolink systems will have cell caps that will cover all the battery cells at once in one unit (3 or 4 in one), other traditional universal systems will have individual watering valves. Either way install them now.
Attach the tubing
Next you will attach the watering system tubing as shown in the installation instructions or diagram with illustration. Route the hoses in a way that they all connect properly with minimal slack or sagging but not in a position where something might kink, pinch or impinge the flow of water when filling. (Like when you put the seat back down over the batteries on your golf cart). Connecting the watering tubes is as easy as pushing the tubing over the junctions. Measuring and cutting the tubing will be required on the universal kits but the pre-cut kits for specific golf cart models should be correct. In any event if you need to cut the tubing you can mark it with the scotch tape to give a good mark to allow for a clean cut around the tubing. We use a magic marker and tubing cutters because it is faster and allows for a clean cut every time.
Hook up the hand pump
After all the tubes are attached and the system is in place – hook up your hand pump to make sure it is the correct one for your battery system. Hand pumps are usually always sold separately and sometimes they have different connectors.
Topping off
You can top off the batteries at this point while you have it hooked up to the system. Put the other end of the hand pump into the top of a gallon jug of distilled water and start priming the system by squeezing the hand pump. Squeeze and release and repeat until you see the water level travel through the tubing and the pump itself. Once it has reached the batteries slow the squeezing motion and pay attention for when the hand pump ball gets hard to squeeze under the pressure of your hand.
Disconnect and cover
Once hard the batteries and system are full. Disconnect and replace dust cover to the system fill valve. Job well done.
Keep a record
Complete by making note of date filled and checked. Good maintenance practices should be periodic say every few months if cart or vehicle used frequently. Bi-annual if not so much.
Video
You can watch a video on installing the hydrolink watering system here should you need a visual. Not all battery watering systems are the same but it will give you a good idea of what to expect or is involved.
Get help
If you would like assistance from the Pete’s Golf Carts team, simply get in touch.