


Alright Let’s Get Started…. You just purchased some new custom golf cart seat covers because your old golf cart seats are looking pretty rough. Plus the neighbor just brought home a new custom golf cart and his had some really cool golf cart seats. So you know you need to replace them anyhow though the cushions themselves are still in good shape underneath and the base board was still good as well. No wood rot or damage so you opted to just re-cover them but not quite sure how is the best way to put them on.
Installing new golf cart seat covers is pretty straight forward. Basically we will just need to stretch the new material over the cushion and secure to the seat base. Though there are a few tricks to make this a painless process and the end result be the custom look you envisioned all along.
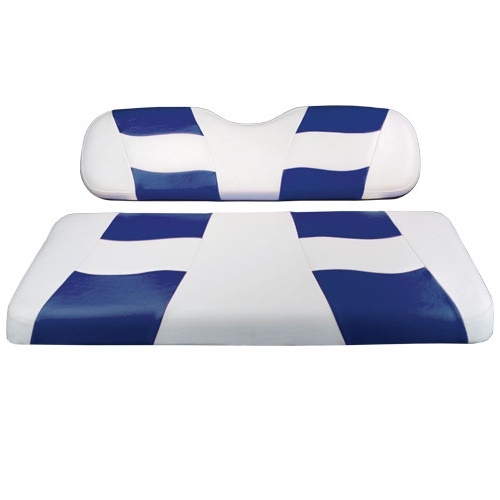
Custom Covers for Rear Flip Seats
All of Pete’s Custom Golf Cart Seat Covers are made specifically for each rear flip seat based on make and model of your golf cart and based on the actual seat manufacture as are most other sellers or upholsters offering them. This allows for a great fit and a custom look once installed. No wrinkles, tight contoured fit every time.
Step-by-Step Installation
So hopefully you purchased the correct ones for your golf cart. Let’s get down to business with a step by step
Tools needed
First off – You are going to need some basic tools to get the job done.
- Heat Gun
- Staple Gun
- Sturdy pick or small flat head screw driver
- Pliers and small wire cutters
Workspace
Next – you will need to find a good working surface that give you room to move the golf cart seats around but doing so without getting them dirty or damaged. You will want to have clean flat surface to work on like a sturdy shop bench or kitchen counter top.
Process
How to get started on the installation.
Remove seat cushions
Now you can remove the seat cushions from your golf cart. Remove the front seat handles or hip restraints. Any and all seat hinges or hydraulic shock assistants. Then you will have to decide do you recover over top of the original cover or remove it? This can go either way just depends on the damage to the previous one. If the seat cushion cover is just sun faded or stained but structurally in good shape (No rips or tears) I say keep it and just go right over it. If it has holes and tears in it you will most likely want to remove , then recover otherwise you will not be happy with the finished result because when you stretch the new golf cart seat covers over the seat cushion the contour will be apparent and if you have a big rip or hole in it you will surely see it under the cover. Especially over time and use.
Plastic trim
Either way you will need to begin by removing any and all plastic trim on the underside, save this for re-installation after the new covers are in place. (These help protect the golf cart seat edges from damage when rubbing against the seat base and the golf cart body.) Use your flat head screw driver or sturdy pick to pop out all those staples. You need to have a good base, flat and solid, to re-staple the new seat covers when the time comes so do this now. This applies to the rear golf cart seat set as well, though you usually will not find the plastic trim pieces in place around the seat cushion base because the seat cushion is permanently fixed to it where as the front seat hinges to access the battery or engine areas.
Clean up
Now clean up your mess and make sure the work surface is clear of all old staples and debris. You surely do not want to damage the new custom seat covers with a crusty staple through the front.
New covers
Now with the work area clean and ready for the task at hand plug in your heat gun and pull out those new custom golf cart seat covers. Find top to bottom and left/right… place face down on the work surface and then place the seat to be covered in the center of the new cover. (I usually measure the seat to be covered and the cover and find dead center – but the pros just eye them up if the design is not so crazy and needs to be spot on.)
Stapling
Now you will want to fire up that staple gun and get your air compressor going if not full or primed already. Then double check you are centered on the cover and pull from top to bottom first and pop a few staples into the top section and then pull cover snug around the bottom and pop a few more. (All thee staples are just to keep the seat cover aligned while you work around it and will be removed eventually). Then you will do the same from left to right or vice versa.
Want more help?
Pete’s team have year of experience fitting out golf carts of every shape and size. Simply get in touch for any extra help or kit.


2 thoughts on “How To Install Your New Custom Golf Cart Seat Covers”
Need 2000 ezgo front seat board or plate that seat cushions attach to?
Darold – Good day! Sorry to say we do not offer just the board… but we do have a great deal going on OEM Ezgo TxT Front seat sets – Check them out here…. On Sale and Free Shipping in USA lower 48.
Pete…
Comments are closed.