


Club Car are one of the most popular brands in golf carts and the Precedent model is a staple here at Pete’s Golf Carts. We’ve sold several versions over the years and have expert advice for every part and spare you might need to keep yours running.
Installing the dash cover
Note
ATTENTION: IF YOU HAVE / OR IF YOU ARE ADDING LIGHTS — When you get to Step 6, if you have lights remove the switch from the key plate then place the key plate back into position. Slide the dash down the steering column into place. Drill a 1/8” pilot hole through the new dash and key plate. Remove the dash and drill out the hole to 9/16”. Drill the hole out on the key plate to 1/2” and install the switch. Now your dash is ready for the light switch.
Safety
Attention: Read all of the following safety and service instructions before attempting installation. Wear safety glasses during installation. Use extra tools as required for installation.
Step-by-step
- Remove the screws behind the steering wheel and remove steering wheel cover.
- Remove the steering wheel main bolt and remove the steering wheel. In order to remove the steering wheel slight force may be necessary by hitting the back side with a rubber mallet.
- Remove the 4 torx bolts on the dash trim and remove the dash trim.
- Place the Dash divider into the right side of the dash and secure with 2 screws at the bottom.
- Slide the drink holder cover over the drink holder and screw into place with 2 screws. Repeat for other side.
- Slide the main dash down through the steering column hole and place the upper lip of the dash behind the stock plastic on the top.
- Slip the dash snugly into place. Pull carefully on the plastic along the bottom of the dash to slip it over the sensor.
- Make sure the sensor is placed through the hole on the underside of the dash.
- Open the glove box and squeeze the top plastic and glove box together while screwing in 2 screws into the top lip of the dash.
- Secure the glove box by placing 3 screws along the bottom edge of the door.
- Place 2 screws into the right side of the glove box as shown.
- Place 3 screws under the dash as shown.
- Secure the left side of the dash with 2 screws as shown. Then re-attach the dash trim piece and the steering wheel and your done.
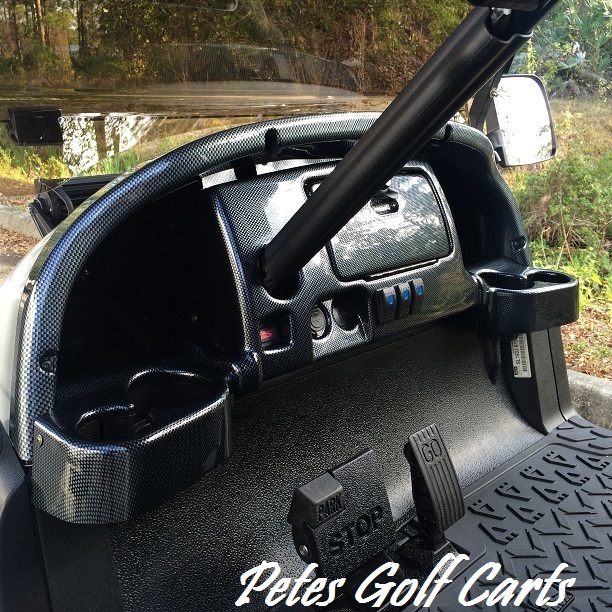
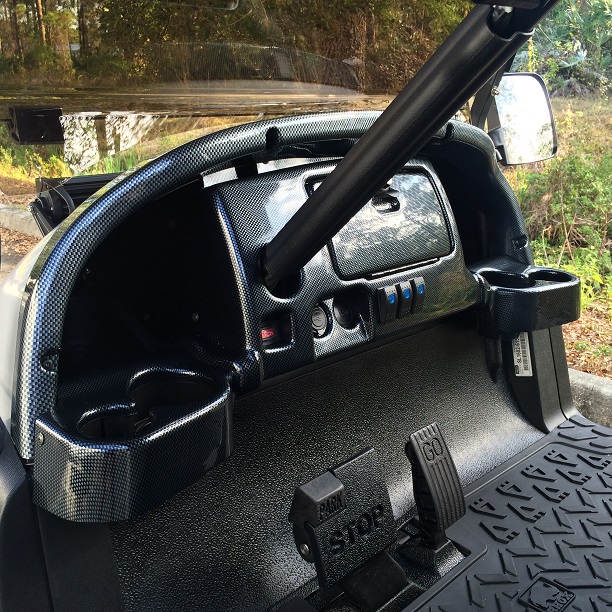
This completes the installation of the Club Car Precedent Dash.
Get the kit
Buy Your New Club Car Precedent Golf Cart Dash Cover Kit Today


4 thoughts on “How To Install Your New Golf Cart Dash Cover On Your Club Car Precedent”
Will the cup holder now properly support a LP heater? Currently my precedent cup holder does not work well for adapter for LP gas heater. It’s not stable. Thx
Randy – Unfortunately the answer is no… as the carbon fiber trim is just that trim . Looks good but does not add any structural integrity to the cup holders…
Pete
This item comes with three dividers. Only one is mentioned in the instructions. Can you provide detailed instructions on each divider including pictures? Nice looking dash.
B – Thanks for the inquiry. The dividers are used on each side of the steering column driver side and then another to close of the space on passenger side…. You can get away with just using two one on either side of dash area. We simple drill pilot holes and screw in place. Box will include installation instructions.
Pete’s team
Comments are closed.